
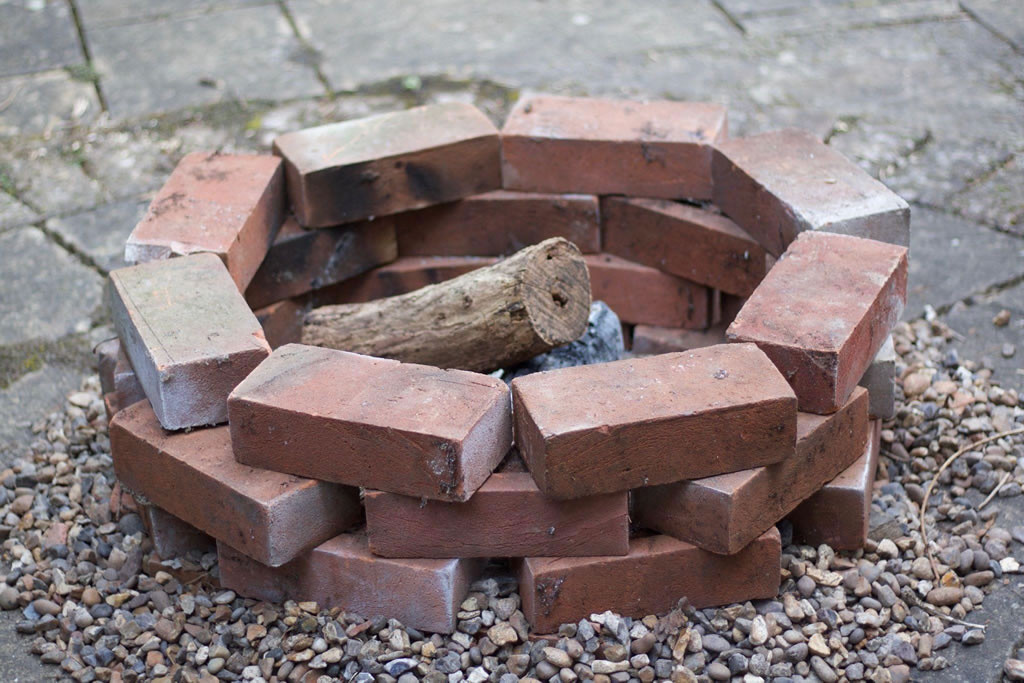
Have you ever sat beside an outdoor fire pit on a cool evening, enjoying the glow and wondering how many bricks it took to build that inviting spot? Building your own fire pit is more than just a weekend project. It is a chance to shape a space for comfort, connection, and quiet moments.
Before you head to the store or start laying bricks, consider how many bricks your fire pit needs. That number depends on its size, shape, and design. With a little planning and some simple math, you can create a welcoming space for gathering with the people you care about.
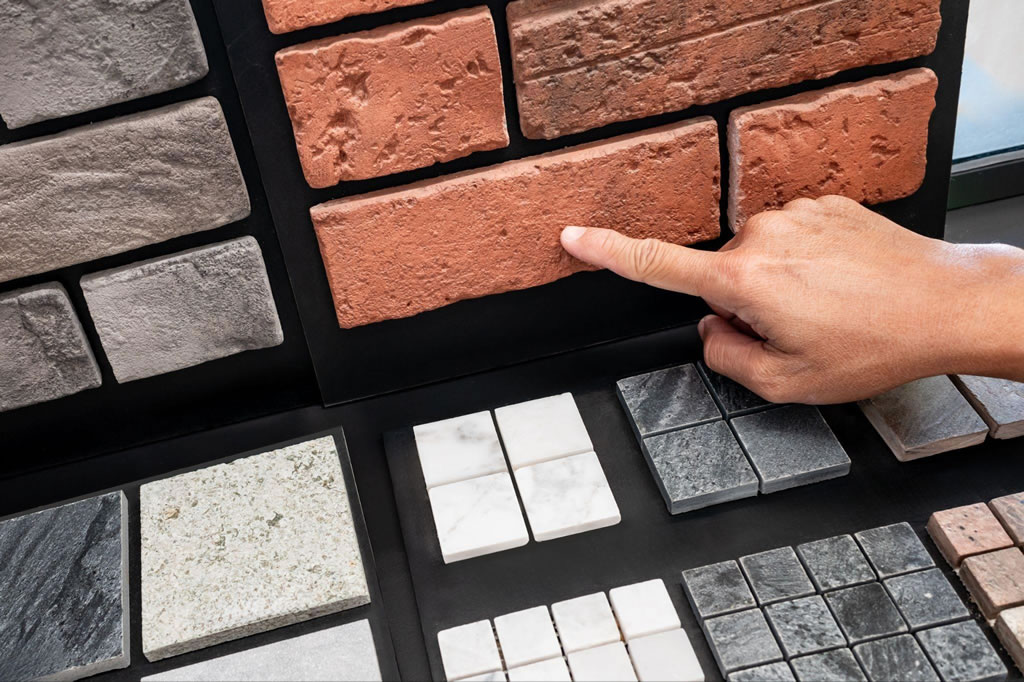
At Batchelder & Collins, we help bring your vision to life. With a wide selection of quality hardscape materials and clear guidance, we can help you choose the right bricks for your DIY project, whether you want a classic round pit or something more custom. Our team supports you at every step, offering the knowledge, tools, and products you need to build a fire pit that is both attractive and built to last.
What Tools Do I Need to Make a DIY Fire Pit?
Building a fire pit requires the right equipment for safe, proper construction.
Basic Tools
Basic tools and accessories help you shape and level your fire pit foundation. Use a shovel or spade to dig the fire pit area, a hand tamper to compact soil and base materials, and a level to keep each layer even. Measure accurately with a tape measure, mark your circle with string and stakes, position bricks with a rubber mallet, and apply mortar or adhesive with a trowel.
Additional Tools
Additional tools make mixing and moving materials easier. Mix mortar in a bucket, move soil and gravel with a rake and wheelbarrow, cut bricks as needed with a brick hammer and chisel, and apply masonry adhesive with a caulking gun.
Safety Gear
Safety gear protects you during construction. Wear work gloves to protect your hands, use safety glasses to shield your eyes, and wear a dust mask when working with mortar or cutting bricks.
Having these tools ready before you start will make your fire pit project go much more smoothly and help you achieve professional-looking results.
Step-by-Step Guide for Building a DIY Brick Fire Pit
Building a brick fire pit is easier than many expect. With a few tools, some planning, and creative fire pit ideas, you can create a cozy, lasting spot to gather outdoors.
Step 1: Choose the Location
Select a flat area at least 10 feet from buildings, fences, and trees for your in-ground fire pit or raised design. Check local codes and HOA rules for any restrictions or permit requirements before beginning your project.
Step 2: Mark the Fire Pit Area
Decide on your fire pit diameter (36–44 inches works well for most yards). Place a stake at the center point, tie string to it, and use chalk or spray paint to mark a perfect circle on the ground.
Step 3: Dig and Level the Base
Dig 6–12 inches deep within your marked circle. Remove all grass, roots, and debris. Use a hand tamper to compact the soil to create a solid foundation.
Step 4: Create a Stable Base
Pour a 2–3 inch layer of gravel or crushed stone into the bottom of the pit to improve drainage and stability. Level the gravel carefully. Some contractors add a layer of lava rock or a concrete footing for added strength, but gravel is sufficient for most backyard fire pits.
Step 5: Lay the First Layer of Bricks
Set the first ring of fire bricks or solid bricks on the gravel foundation. Tap each brick with a rubber mallet to keep them tight and level. If using a metal fire ring, set it within this first ring for added support and to maintain shape.
Step 6: Apply Construction Adhesive or Mortar
Apply heat-resistant masonry adhesive or refractory mortar to the surface of the initial layer of bricks to hold them together. Spread the adhesive carefully to avoid excess squeezing out between the bricks.
Step 7: Build Additional Layers
Continue stacking bricks in an offset pattern to increase strength. Build 4–6 layers to reach a height of 12–18 inches. Use the rubber mallet and level often to keep bricks aligned and even. Leave occasional small gaps for airflow.
Step 8: Finish the Top Edge
Top the fire pit with a row-lock course of flat stone caps or bricks placed on edge. Anchor these caps with mortar to protect the joints and help contain sparks. Smooth the mortar joints for a clean finish.
Final Touches
Allow the mortar or adhesive to set for 24–48 hours before use. Add a layer of gravel inside the pit for drainage. Install seating or pavers around the fire pit for comfort and safety, and consider landscaping to help it blend naturally into the yard.
Do I Need Firebricks for a Fire Pit?
Firebricks are designed to withstand high temperatures, making them ideal for lining the interior of a fire pit. Unlike regular bricks, firebricks use special clay that handles extreme heat without cracking, crumbling, or exploding.
The key differences include:
- Firebricks are denser and less porous.
- They have lower water absorption rates.
- They are designed to withstand temperatures up to 2,000°F.
- They provide better heat reflection for improved fire performance.
Can I Use Regular Bricks for a Fire Pit?
Regular bricks can work for the exterior fire pit walls, but they are not suitable for the interior lining. Standard bricks contain moisture and may have air pockets that expand when heated, which can cause them to crack or even explode when exposed to direct flames.
A cost-effective approach is to use firebricks for the interior wall and standard bricks for the exterior. This combination offers the necessary heat protection while helping you manage your project budget.
If you cannot find firebricks, consider these alternatives:
- Use refractory cement
- Install soapstone blocks
- Choose certain heat-resistant natural stones
These alternatives often have higher costs or require specialized installation.
How Many Bricks Do I Need for an Outdoor Fire Pit?
The number of bricks needed for your fire pit project depends on several important factors that every DIY builder should consider before purchasing materials. Larger diameters require more bricks to complete the circle. Round pits typically use more bricks than square ones because of their curved layout. Standard bricks cover less area than larger pavers or blocks. Double-walled designs will roughly double your brick requirements. Taller fire pits need additional courses of bricks. It is also a good idea to purchase 10–15% extra to account for breakage and cuts.
Size
Keep in mind that the actual brick count can vary depending on the size of your bricks, the design of the pit, and whether you’re stacking them with gaps or using mortar.
- Small fire pit (3 feet in diameter):
- Single-layer: 80–100 bricks
- Double-layer: 160–200 bricks
- Medium fire pit (4 feet in diameter):
- Single-layer: 120–140 bricks
- Double-layer: 240–280 bricks
- Large fire pit (5 feet in diameter):
- Single-layer: 160–180 bricks
- Double-layer: 320–360 bricks
Shape
The shape of your fire pit affects both its appearance and how many bricks you will need. Here is a look at popular designs and the approximate number of standard bricks each one may require.
- Circular fire pits ranging from 36 to 60 inches in diameter generally require approximately 80–360 bricks for a single layer, depending on their size.
- Square fire pits of similar dimensions typically use about 100–300 bricks for a single layer.
- Rectangular designs require a calculation based on the total perimeter, with brick usage usually falling between round and square configurations.
How to Calculate Brick Count for a DIY Fire Pit
There are two simple ways to estimate the number of bricks you will need for your fire pit. You can choose the method that works best for your style and planning needs.
Use a Brick Calculator
Online brick calculators make estimating materials quick and accurate. You simply input your fire pit’s dimensions, including diameter for circular pits or length and width for square ones, the height, and the size of your bricks. These tools typically factor in mortar thickness and add a percentage for waste. Using a calculator can save time and reduce the risk of buying too few materials, which might delay your project.
Manual Calculation
If your design is unique or you want more precision, you can manually calculate the brick count with these steps:
- Measure your fire pit dimensions, using diameter for round shapes or perimeter for square and rectangular designs.
- For circular pits, calculate the perimeter by multiplying π by the diameter.
- For square or rectangular pits, add all sides to determine the total perimeter.
- Divide the perimeter by the length of one brick (including the mortar gap) to find the number of bricks needed per layer.
- Determine the number of layers by dividing the pit height by the brick height, including mortar.
- Multiply the number of bricks per layer by the number of layers to get the total count.
- Add 10–15% extra to account for breakage and cuts.
For example, a 36-inch-diameter round fire pit using standard bricks (8 inches long) would need approximately 14 to 15 bricks per layer. At 4 layers high, this design would require 56–60 bricks, plus extras for a total of around 65–70 bricks.
Tips for Purchasing Bricks for Your DIY Fire Pit
When buying bricks for your fire pit project, choose firebricks for the interior lining because they can handle high temperatures safely. Always purchase 10–15% more than your calculations indicate to account for breakage or cutting errors. Quality matters, and investing in durable bricks can help prevent repairs in the future.
Consider purchasing in bulk to save money, especially for larger projects. Exterior walls can use standard clay bricks, but firebricks remain necessary for the interior lining. Concrete pavers and certain types of natural stone are other options that many homeowners choose for their designs.
Cost and Budget Considerations
Simple DIY brick fire pits typically cost $200–$500, while more sophisticated stone designs can cost $1,000 or more. You can reduce costs by searching locally for secondhand bricks or checking construction sites for overruns.
Remember to include hidden costs such as mortar, adhesive, gravel, and equipment. For those on a tight budget, consider using recycled pieces from old patios or walkways.
Enhancing Fire Pit Surroundings
Define your seating area with gravel, pavers, or decorative mulch to improve both safety and aesthetic appeal. Add landscape edging to create clean lines, and install a weed barrier underneath to reduce maintenance needs.
Consider a variety of seating options such as weatherproof chairs, benches, or repurposed logs and stumps. Add string lights or solar path lights for evening illumination. Personalize the space with small tables, potted plants, or wind chimes to create a welcoming outdoor gathering area.
Why Our Customers Choose Batchelder & Collins
Since 1868, Batchelder & Collins has been Hampton Roads’ trusted source for quality masonry products. Our family-owned business, now in its fifth generation, combines historical knowledge with modern customer service.
Our customers consistently mention our knowledgeable staff who guide them through every step of their fire pit projects. Whether you are selecting the right firebricks for heat resistance or calculating the exact quantities for your design, our team offers personalized advice based on 155 years of masonry experience.
Testimonials
“As a first time customer being greeted with a smile made my day. Vicky was very helpful and informative. I’ll definitely be a returning customer” — Joshua M.
“I love this place. They always have what I need and all the staff is so very helpful ! Keep up the good work.” — Debra L.
“I’ve been coming here for over 20 years and my preferred brick yard of the area! Friendly, professional and prompt service!” — James H.
Frequently Asked Questions
What is the Ideal Size for a Fire Pit?
The ideal size for a fire pit depends on your available space and how you plan to use it. A smaller fire pit works well for intimate gatherings with a few people, while medium to larger designs offer more room for group seating and greater heat output. Most homeowners find that a diameter between 36 and 44 inches offers a good balance by providing enough warmth and space for conversation without overwhelming the yard. Carefully consider the size of your yard, the number of guests you typically entertain, and local safety guidelines when choosing the right dimensions for your project.
How Deep Should a Fire Pit Be?
The optimal depth for a fire pit is 12 to 14 inches. This depth contains the fire safely while allowing proper airflow. Shallower pits risk escaping embers, while deeper ones may limit oxygen and create excessive smoke.
What Do You Put at the Bottom of the Fire Pit?
To create a safe and effective base for your fire pit, line the bottom with non-combustible materials that support drainage and airflow while protecting the surface below. Gravel or crushed stone is the most common choice, providing reliable drainage and stability. Other options include sand for a level base, lava rock for its heat resistance and airflow enhancement, fire glass for a decorative and heat-safe finish, and firebricks for durability and efficient heat retention. Selecting the right combination of these materials can improve both the safety and performance of your fire pit.
Do I Need a Fire Pit Ring for a DIY Fire Pit?
While a metal fire pit ring is not absolutely required, it offers several important benefits that improve the safety and longevity of your project. A fire ring helps protect the surrounding brick or stone from direct heat damage, contains logs and embers securely, and maintains the circular shape during construction. Investing in a quality steel ring with a heat-resistant finish can extend the lifespan of your fire pit and provide added peace of mind when enjoying outdoor fires.
Plan Your Fire Pit Project With Batchelder & Collins
Building a fire pit is more than stacking bricks; it is about creating lasting memories around a warm, inviting focal point in your outdoor space. With the right materials, tools, and guidance, your DIY fire pit can become the centerpiece of countless evenings shared with family and friends.
At Batchelder & Collins, we have supported Hampton Roads homeowners in creating beautiful outdoor living spaces since 1868. Our five generations of masonry knowledge mean we understand what materials are needed for a fire pit that will endure over time. Serving homeowners, contractors, and designers in Norfolk, Williamsburg, and throughout the region, we offer a wide selection of durable fire bricks, standard bricks, retaining wall blocks, and professional-grade masonry supplies for your home improvement projects, helping you build with confidence.
If you are ready to start your project, contact us today by calling 757-625-2506 or by filling out our contact form.

