
A paver patio offers long-term value by combining curb appeal with functionality. It provides a dedicated space for outdoor living, such as dining, relaxing, or gathering around a fire pit.
This project does not require advanced skills. With a step-by-step plan, basic tools, and the correct base materials, you can build a patio, upgrade an existing concrete space, or add a new paver walkway.
What You Need to Build a Durable Paver Patio
Before starting your DIY patio project, gather the essential tools and materials to create a stable and long-lasting foundation.
Tools
- Shovel for excavation
- Plate compactor or manual tamper to compact soil and base layers
- Level and string line to guide proper slope
- Rubber mallet for setting pavers without damage
- Garden hose for shaping and activating polymeric sand
Materials
- Pavers
- Crushed gravel
- Coarse paver sand (often labeled concrete sand)
- Landscape fabric
- Plastic or metal edging
Each item plays an important role. Gravel and sand promote drainage and structural stability. Landscape fabric reduces weed growth, and edging secures your patio layout.
Safety Equipment and Optional Tools
Safety should always come first, even for DIY projects. Wear work gloves to protect your hands, eye protection when cutting pavers, and ear protection if using loud power tools. A respirator is recommended when handling dust from cutting or spreading sand.
Optional tools can improve comfort and efficiency. A wet saw or masonry splitter makes cutting pavers cleaner and quicker. Knee pads are helpful for longer projects and reduce strain. While not essential, these additions can make your project easier and more comfortable.
Design a Paver Patio That Fits Your Space and Style
Your patio design should complement both the shape of your yard and the way you plan to use the space. Common layout shapes include squares, rectangles, circles, and freeform designs for a more natural flow. Pattern options include herringbone for strength, basketweave for added texture, or running bond for a clean, simple look.
Add interest with contrasting borders, multi-tone pavers, or inlaid accents. Sketch your layout or use a free online design tool to explore options. Think about how you will use the space. Will it support a fire pit, grill, or outdoor dining area? A thoughtful layout helps balance appearance and function.
Upgrade Your Patio With Decorative and Seasonal Features
Add beauty and function to your paver patio by incorporating seasonal and aesthetic elements. Use container gardens or raised beds to bring in color and greenery. Install string lights or solar markers to improve lighting for evening use.
For added ambiance, consider a water feature, built-in bench seating, or decorative stone veneer. These upgrades can increase visual appeal while making your patio more enjoyable and practical throughout the year.
Step 1: Plan Your Patio Layout and Materials
Taking time to plan your patio layout will help you avoid delays and reduce unnecessary costs. Start by selecting the location in your yard and marking the perimeter using landscaping paint, stakes, and string.
Measure the area in square feet to determine how much material you will need. Choose pavers that match your style and are readily available. If your design includes multiple colors or patterns, plan ahead so you can purchase the correct quantities.
Batchelder & Collins offers a wide selection of pavers to fit nearly any design, whether you want a simple layout or a more decorative look.
Step 2: Gather Materials Before You Begin Building
Before visiting your nearest Batchelder & Collins location, make a list of the tools and materials you will need. If you’re unsure how many pavers to purchase, refer to our blog post on calculating patio material quantities.
Here’s what you’ll need for most patio builds:
- A 4-inch layer of finely crushed gravel across the entire patio area
- A 1-inch layer of concrete sand
- Edge restraints for the perimeter
- A 6-foot piece of 2×4 lumber for screeding
- A pick
- A rake
- A shovel
- One or two heavy-duty brooms
- Your selected pavers
Step 3: Prepare and Excavate the Patio Site
A solid foundation begins with thorough site preparation. Start by removing any furniture, vegetation, or debris. Call 811 to check for underground utilities and review local building codes and HOA requirements before digging.
Excavate the Patio Area
Dig to a depth that includes 4 inches of gravel, 1 inch of sand, and the thickness of your selected pavers. Use a plate compactor or hand tamper to firmly compact the soil. Add the gravel layer and level it using a rake.
Mark the Patio Perimeter
Outline the patio area using string and batter boards or a garden hose. Check diagonal measurements to confirm square corners. Maintain a steady ¼-in.-per-foot slope away from all structures so water sheds clear of foundations and does not pool on the patio.
Clear and Compact the Base
Remove all sod, roots, and rocks to expose the bare soil. Compact the area evenly, correcting any soft spots. A smooth, firm base is key to preventing shifting or uneven pavers later.
Step 4: Install Weed Barrier for Long-Term Maintenance
Weed prevention is a key part of patio construction that helps minimize future upkeep. Cover the entire excavated area with landscape fabric or geotextile material.
Overlap the seams by at least 6 inches and secure the edges using garden staples or sections of the paver base. This barrier helps block weed growth, improves drainage, and reduces long-term maintenance needs.
Step 5: Build a Stable Gravel Base Layer
A strong paver patio begins with a well-compacted gravel base. Spread 4 to 6 inches of crushed gravel over the area in 2-inch layers. Compact each layer using a plate compactor or manual tamper.
Check your slope as you go using a string line or level to maintain proper drainage away from structures. This gradual, layered method helps prevent shifting or settling over time.
Step 6: Add and Level the Paver Sand Layer
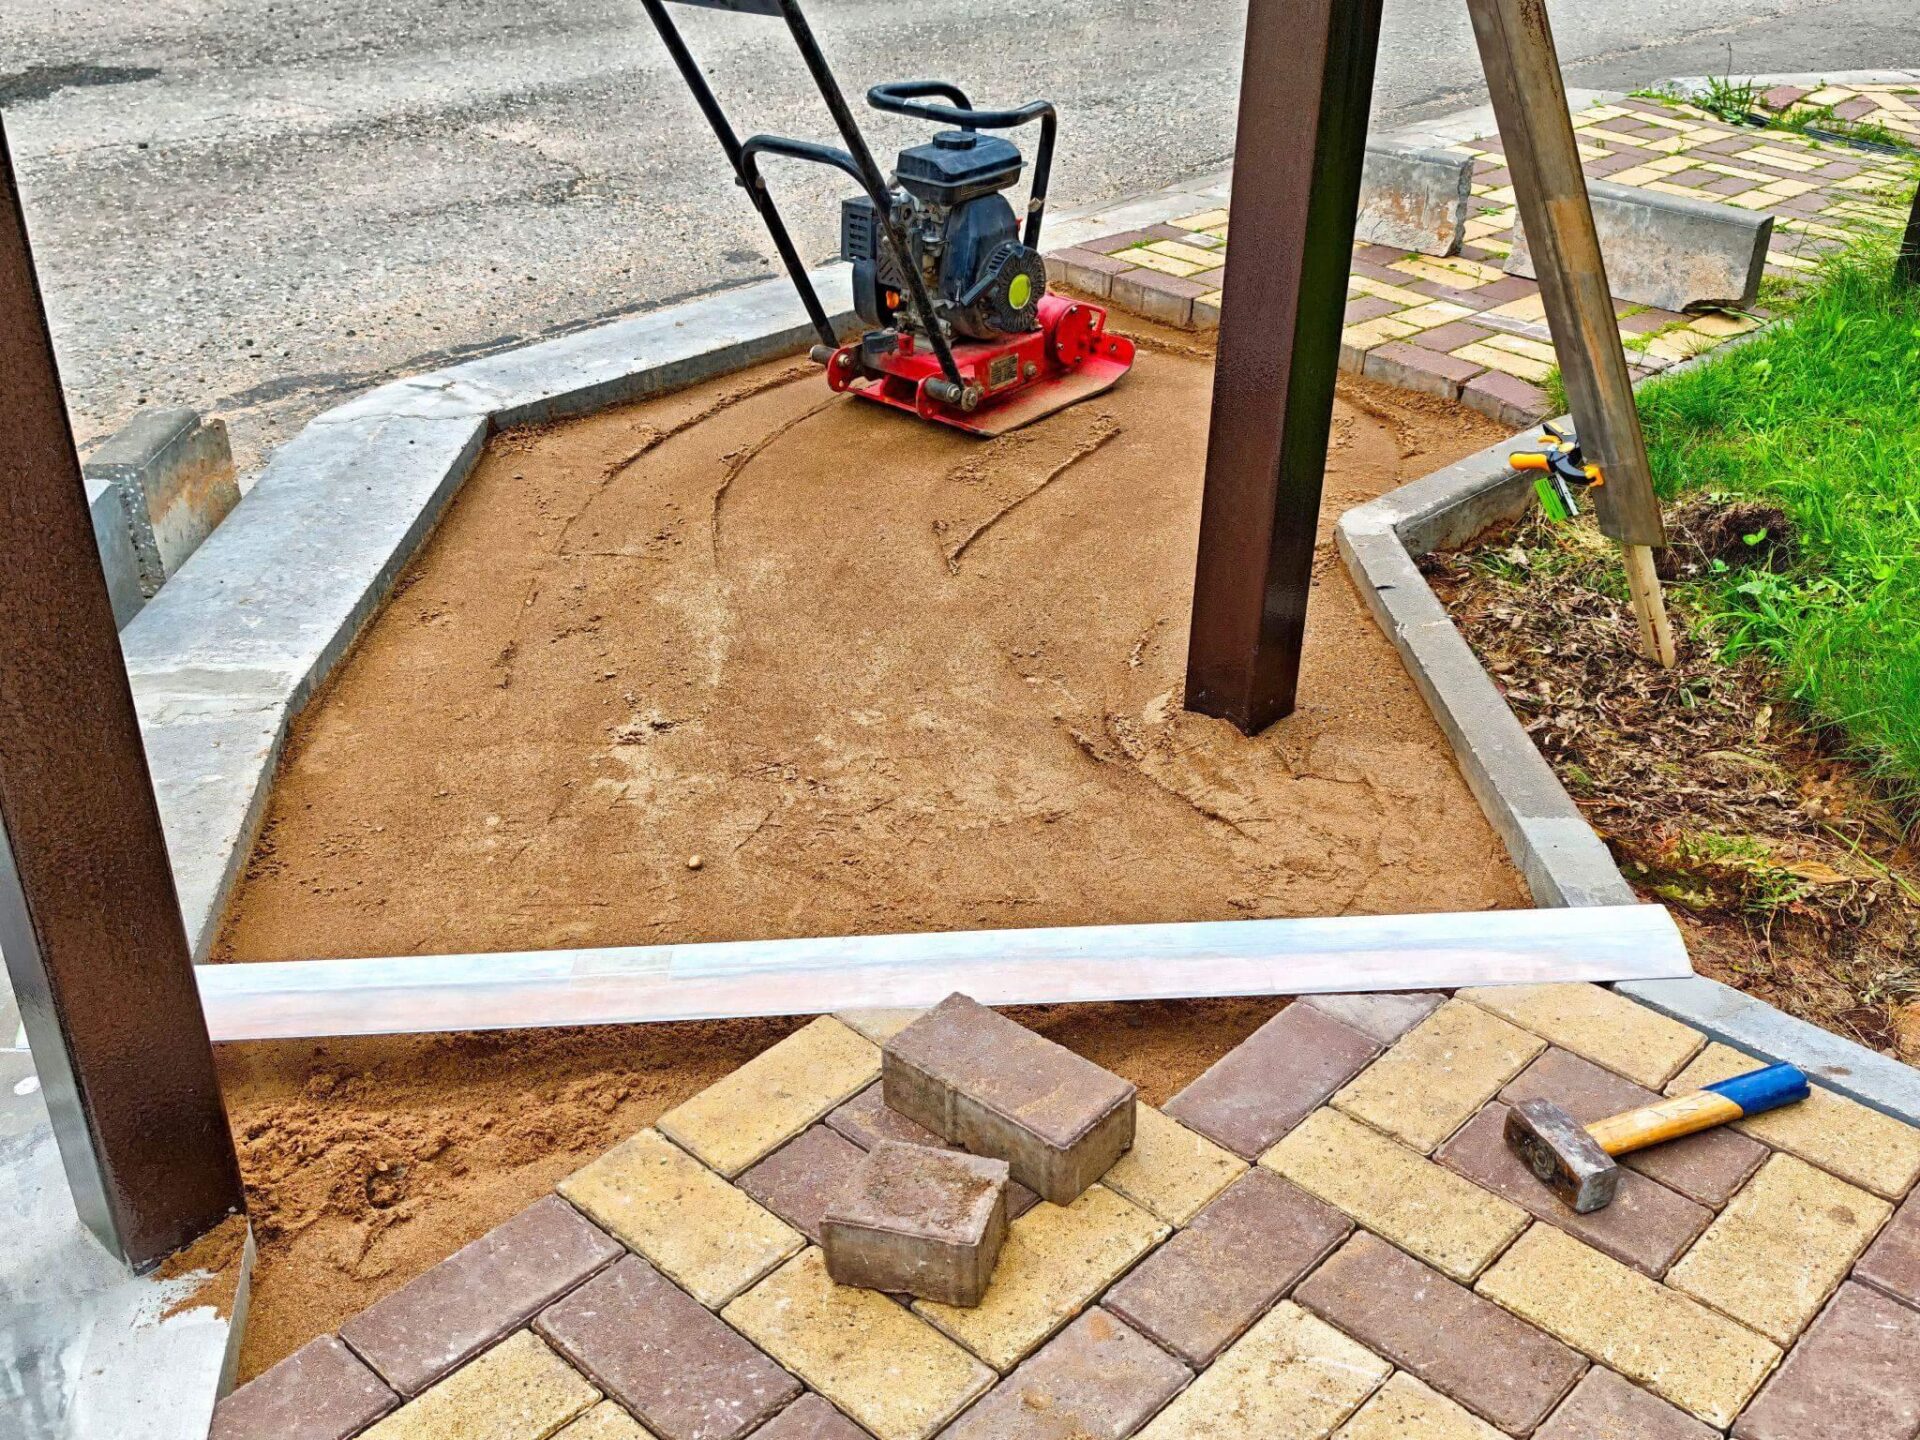
Once the gravel base is fully compacted, spread a 1-inch layer of paver sand across the surface. Skip play sand since its fine grains refuse to compact, wash out easily, and lead to shifting pavers
Lay ¾-in. or 1-in. diameter conduit as screed rails, drag a straight 2×4 across to level, then lift the rails, fill the voids with sand, and smooth before laying pavers. Avoid walking on the sand once it has been leveled, as footprints can cause uneven areas that affect paver placement.
Step 7: Confirm Slope and Final Surface Level
Before you begin laying pavers, double-check that the sand surface is level and maintains the proper slope for drainage. Use a long level, string line, or laser level to measure accuracy.
A consistent slope away from buildings helps prevent standing water and long-term damage. Taking extra time at this stage can improve the quality and appearance of your finished patio.
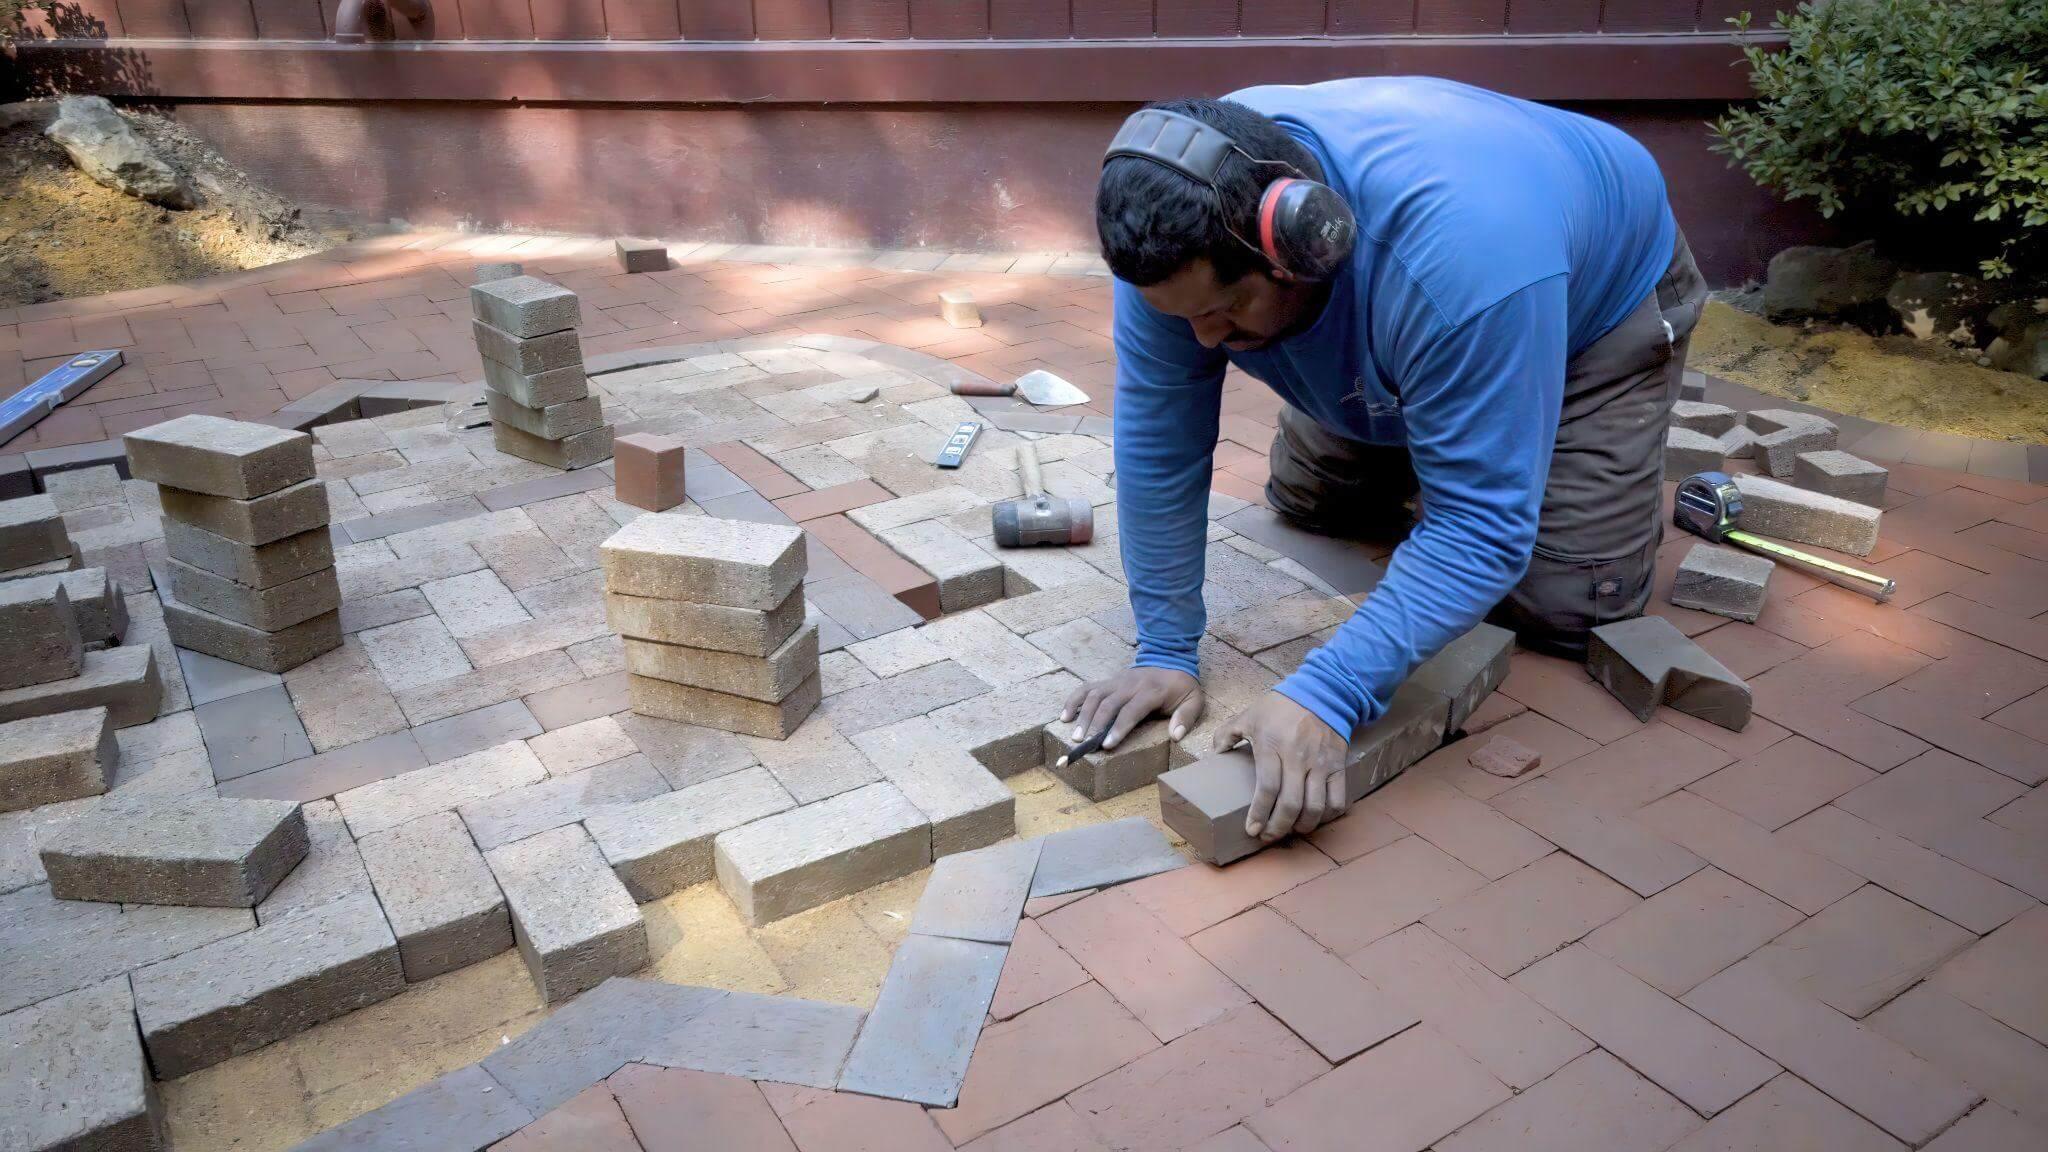
Step 8: Dry-Lay and Cut Pavers as Needed
Before installing your pavers, dry-lay a few rows to visualize the pattern and spacing. Use plastic spacers to keep joints even across the surface.
If your design requires edge adjustments, cut the pavers using a masonry saw or splitter. Always wear safety glasses and follow proper cutting guidelines to protect yourself during this step.
Step 9: Lay the Pavers and Fill the Joints
Begin in one corner by spreading a 1-inch layer of concrete sand over a small section, approximately 4 feet by 4 feet. Screed the sand with a straight edge or a 1.5-inch by 3.5-inch board (standard 2×4) to make it level.
Place the first paver flush against the edge restraint, gently lowering it into place. Continue laying pavers snugly against each other, using the restraints as a guide. When you reach the edge of your current sand section, prepare the next area and repeat the process until the entire patio is covered.
Once all pavers are in place, add a thin layer of concrete sand (about 1/4 inch) on top. Use a heavy-duty broom to sweep the sand into the joints between pavers. This locks them in place and adds stability. Sweep away any excess once the joints are filled.
Step 10: Secure the Edges and Finish the Surface
After laying all pavers, install rigid edge restraints, such as plastic, metal, or poured concrete, along the border to lock the layout. Opt for concrete edging in high-traffic or driveway applications
After the pavers are fully compacted in place, sweep polymeric sand into the joints until filled. Do not use polymeric sand for the bedding layer. Lightly mist the surface with a hose to activate the bonding agents in the sand. Once cured, the sand will harden to help resist weed growth and insect intrusion.
Sealing the pavers is optional. However, it can protect the surface from stains and weather while enhancing color and overall appearance.
Troubleshooting Common Paver Patio Problems
Even well-built patios can experience minor issues over time. If your pavers begin to shift, check the base layer and edge restraints for gaps or loosening. Uneven areas often indicate a leveling error — lift the affected section, re-screed the sand, and reset the pavers.
Pooling water usually means the slope needs adjustment or added drainage. If weeds appear, sweep more polymeric sand into the joints and consider applying a sealant to reduce growth.
For help selecting the right materials to prevent these issues from the start, or to replace worn-out components, Batchelder & Collins offers trusted guidance and durable hardscape products.
Maintain Your Paver Patio for a Long-Lasting Upgrade
Keeping your patio in good condition requires routine care. Sweep regularly to remove dirt and debris. Hose off the surface as needed, and inspect joints for signs of weed growth or shifting.
Reapply joint sand every few years to keep pavers securely in place. Consider resealing the surface every two to three years to protect against weather and wear.
If a paver becomes loose or cracks, it can often be replaced without removing the surrounding stones. With minimal upkeep, your patio can remain a beautiful and functional outdoor space for years to come.
Why Customers Choose Batchelder & Collins
Homeowners across Norfolk and Williamsburg rely on Batchelder & Collins for dependable service and high-quality hardscape materials. Whether you’re tackling your first paver patio or updating an existing backyard space, our team can help you choose the right materials for long-term results.
From durable pavers to essential tools and accessories, we offer a wide selection of products to support every phase of your patio project. Our knowledgeable staff provides personalized guidance so you can build with confidence and get the most out of your backyard investment.
Testimonials
“What an amazing place. I brought in a brick that was from my 10-year-old house… they matched it pretty well. They have 2 yards full of brick and stone.” — Jacqueline K.
“Visited to buy tools for my son’s new job as a mason apprentice… Great staff, very helpful. Thank you.” – Victoria L.
“We at Champion Fences have worked with Batchelder & Collins for years. They are a very professional and customer service based company. I recommend them for any job in the Coastal VA area…” – Champion F.
Frequently Asked Questions
Is It Cheaper to Buy or Make Your Own Pavers?
Making your own pavers can reduce costs by up to 50% compared to store-bought options. However, manufactured pavers are typically more durable and provide a cleaner, more consistent finish.
Can a Paver Patio Increase Home Value?
Yes. A professionally installed or well-constructed DIY patio can improve curb appeal and increase home value, especially when it’s low-maintenance and thoughtfully designed.
Can I Build a Fire Pit on a Paver Patio?
Yes, but confirm the pavers are rated for high heat. If not, remove a few and build the fire pit on a non-combustible base (fire-rated bricks or a steel fire ring) to avoid cracking.
Do I Need a Permit to Build a Paver Patio?
Permit requirements vary based on your city or neighborhood. Smaller patios often do not require permits, but always check with your local municipality or homeowners association before starting.
How Deep Should I Dig for a Paver Patio?
For most patios or walkways, dig 4 to 6 inches. For areas that support heavy loads or have poor soil, excavation may need to reach 10 to 12 inches.
Can I Lay Pavers Directly on Dirt?
It is possible, but not recommended. Dirt shifts over time and lacks drainage support. For a long-lasting surface, build on a compacted gravel and sand base.
Explore Paver Options at Batchelder & Collins
Whether you’re designing a new patio or upgrading your existing backyard space, Batchelder & Collins offers a wide selection of clay, concrete, and porcelain pavers to meet your needs.
Visit our Norfolk or Williamsburg locations for personalized product recommendations and design support. Call 757-625-2506 or complete our contact form to get started.

